Squatting is a fundamental movement pattern that we’re all born with. While there’s no shortage of articles and videos on squats, the reason why I’ve written this article is because there’s also no shortage of confusion and misunderstanding around how to squat, that it’s keeping people stuck and afraid to do something we’re born to do.
I was especially compelled to bust 5 of the biggest myths on how to squat properly that are so pervasive in the fitness world that many trainers and coaches are perpetuating these falsities.
The benefits of squats include the obvious ones such as maintaining mobility in our hips, knees and ankles and building functional lower body strength, but squats also benefit our digestive and elimination systems via pumping and massaging the stomach and intestines to help keep things moving.
And the deeper we squat, the greater the benefits.
But we’re not going to cover different squat variations or the intricacies of program design to improve your squat 1RM here…
My goal with this article is to help you understand how to squat more completely so you no longer succumb to the common myths that I’m sure you’ll continue to hear and ultimately, help you squat deeper and with less restriction (both mental and physical).
And we’re not going to go into squat anatomy or biomechanics at all.
To do a basic squat properly, you don’t need to understand exactly what muscles are firing or the exact amount of shear force at the knee when at parallel with 135 pounds on your back.
How do I know?
Well, my daughter Livia can squat pretty good and she has no clue about all this stuff:

The bottom line is that you should be able to smoothly get your ass to grass, hang out for a bit, then smoothly come back up while keeping a decently tall posture.
Forget about all of the details (for now) and let’s see if we can see the forest first before we start to analyze the leaves on the trees.
So, what are we going to cover then?
These 2 things:
- The 5 Biggest Myths Around Squats
- Key Takeaways on How to Squat for Health and Performance
Let’s get started, shall we?
Squat Myth #1
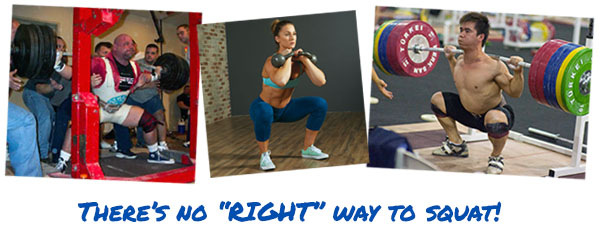
There’s A “Right” Way To Squat
Should your feet be lined up straight or turned out?
Should your feet be shoulder width, wider, or narrower?
Should I put the bar on my upper traps (weightlifting/bodybuilding style) or lower down my upper back (powerlifting style)?
Should I even use a barbell or are dumbbells or kettlebells better or just bodyweight?
The answer is…
IT DEPENDS!
It depends on the your individual set of hips.
It depends on your goals.
It depends on your available equipment.
There’s no sole right way to squat.
Once you understand that, you’re free to do whatever feels right to you.
Here’s a great place to start to find your squat stance:
- Jump and wherever your feet land, that’s the width you test
- Feel free to turn your toes out up to 30°
- Try a squat and see how it feels, if it feels fairly natural, use it for whatever squat variation you want (Back Squat, Front Squat, Goblet, Double KB, etc)
- If it feels unnatural, adjust width in or out by a couple of inches and keep trying until you find something that feels good
This method of finding squat stance has worked well enough for my clients over the years so if you’re at all unsure of where to start, try it for yourself and go – don’t get lost in the details.
From there, if you’re looking to use squats to build strength and/or muscle, here are the form tips I suggest you pay attention to the following points:
Basic Squat Form Tips
- Keep good posture with shoulders back and chest out
- When you descend, push your knees out so that your thigh (femur) points in the same direction as your feet
- Inhale on the descent, you can hold your breath during the transition, then exhale on the way up
- Look straight ahead not up to maintain spinal alignment
Those are the basics of a typical fitness squat that will help you build strength and stay injury-free so I suggest you use them.
And if you’re going to squat with weight but depth is an issue, I suggest you start with the Goblet Squat because it’s easier to get deeper while maintaining posture.
Build up your strength there until you’re doing at least 6 good reps with a 45 pound dumbbell, then transition to barbell variations as that’s a perfect segue since a barbell weighs 45 pounds.
Video from the Olympic Lifting Mastery Course
This progression allows you to build strength and mobility before getting to the more difficult (from a mobility/technical perspective) Back and Front Squats.
So there’s where you start.
Good to go?
WHOA not quite yet – we’ve got more myths to bust!
Squat Myth #2
Butt Wink (and/or Lumbar Flexion) is BAD
One comment I often hear is that people are afraid of the “butt wink” phenomenon occurring when they squat, preventing them from going deep.
So, they do half-ass squats all day long in hopes of preventing low back pain.
Let’s first define butt wink, then we’ll address this myth.
What the heck is “butt wink”?
Butt wink is the term used to describe what occurs during the squat when your pelvis goes from an anterior to posterior tilt, which you can see in the diagram below as the yellow line indicates more posterior tilt in the second image.

Try this – make the motion of grabbing the pelvis in the image with your hand (not your own pelvis, perv!) and rotate it counter-clockwise – this is posterior pelvic tilt and when this happens during a squat is called butt wink.
Here’s a random video of somebody who posted their butt wink on YouTube so you know exactly what we’re talking about:
Maintaining a neutral lumbar spine and preventing things like butt wink is a concept that like many valid concepts in fitness, has been taken too far.
In particular, my old university prof Dr. Stu McGill has popularized the neutral spine approach to low back pain rehabilitation.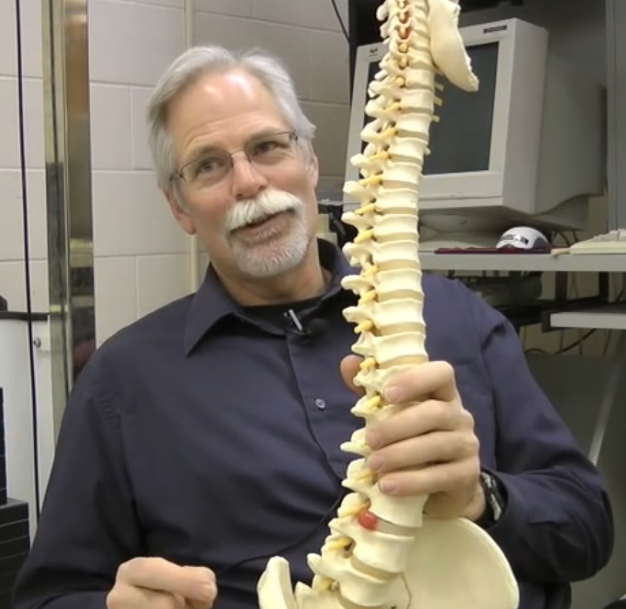
The problem is when this approach is applied to healthy or athletic populations.
Sure, it’s a safer bet to simply maintain a neutral spine at all times, but the reality is that movements in sport and life require varying degrees of motion from the spine, whether it’s flexion, extension, side bending, rotation or a more complex movement and if the spine and its tissues aren’t ready for these movements, pain and injury can result.
For example, unless you’re at least 6’3” tall, retrieving a baby from a crib is going to result in flexion of your spine and if you’ve never flexed your spine while lifting a squirmy 20 pound baby, you may be in for some back pain.
I’m 6’ tall and despite my best efforts and rescuing Livia when monsters were attacking her, I could not maintain a neutral spine.
And a quick look at some MMA fights will show you that flexion of the spine is a common occurrence that fighters will never be able to avoid, especially when the fighters are grappling (like my man Demian Maia):
So, like everything with the body, we either use it or lose it.
All tissues in the human body get stronger by adapting to stress and get weaker when they are not stressed.
We all understand this concept with respect to muscles, but it’s also true for tendons, ligaments, intervertebral discs and even nerves.
When we go into lumbar flexion, spinal ligaments are loaded and intervertebral discs are stressed posteriorly.
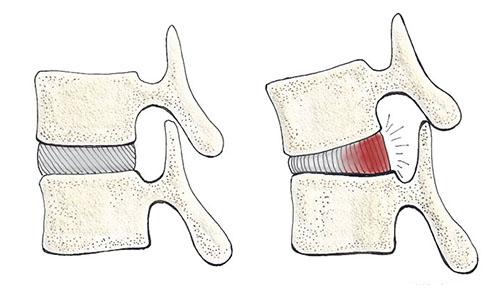
If these tissues aren’t ready for the loads you throw at it, damage and pain could result.
When we train these tissues through proper intensity and volume over time, they’ll adapt, strengthen and you’ll have built a more resilient spine.
But if we avoid any and all lumbar flexion like the plague, when we do have to perform this movement in life or sport, tissues can be damaged even from the tiniest amount of stress because they’ve atrophied since they’ve never been used.
Makes sense, right?
The most basic exercise to train flexion-extension of your spine is the Cat/Camel.
This movement will maintain range, but won’t do too much to strengthen the tissues, because the load is so low.
From there, Rounded Back Deadlifts aka Jefferson Curls can be used, starting with bodyweight only and adding weight very slowly.
There are too many things I love about that video to describe here.
Note that passive tissues like ligaments and tendons adapt and strengthen much slower than muscles, so add load slowly and steadily and always play it conservatively because an injury to these tissues can take months to heal.
Anyway, the main point I want to make is that many things in the fitness industry labeled as “bad” are usually not so i.e. slow, steady state cardio.
The key is understanding what is actually happening in the body and if the exercise, movement or technique will help you move closer to your goals.
If you don’t have the deep understanding, you need to find sources you trust and NOT just follow what’s popular.
Now, with respect to this myth, let me give you a couple of clear takeaways:
- Butt wink or lumbar flexion are BAD if you’re doing a very heavy Back Squat or Deadlift or you’ve never properly conditioned lumbar flexion before.
- Butt wink or lumbar flexion are BAD if you’re doing a very heavy Back Squat or Deadlift or you’ve never properly conditioned lumbar flexion before.
Squat Myth #3
Butt Wink Is All About Hamstring Flexibility
Let’s say you want to squat some heavy loads but you’ve still got butt wink.
What to do?
Whenever I’m faced with a question like this, I consult Google.
But in this case, you’ll find the majority of articles and videos talk about hamstring flexibility.
Unfortunately, this advice is misguided.
Hamstring flexibility being the cause of butt wink is the most common myth likely due to a lack of full understanding of the anatomy and biomechanics of the hamstrings.
The hamstrings can create posterior pelvic tilt.
So if they’re tight, they’re pulling the pelvis more into posterior tilt and this is why tight hamstrings cause butt wink as you get deeper into the squat, right?
NOPE.
The thing about the hamstrings is that they are a two joint muscle, meaning they cause movement at two joints, the hips and knees, unlike most muscles that work at only one joint.
The hamstrings cross both the knee and the pelvis (except the short head of the Biceps Femoris, which only acts at the knee), causing knee flexion and hip extension, respectively.

When you squat, yes, the hip goes into extension, increasing tension on the hamstrings, but the knees simultaneously go into flexion, decreasing tension on the hamstrings.
The net effect is negligible, based on the fact that the hips flex about as much as the knees do when you squat, so biomechanically, hamstring length cannot be the culprit.
But if you don’t believe me, you can quickly rule it out by doing a simple test, which I call the Supine Squat Test:
- Lie on the floor with your lumbar spine in neutral (lumbar spine in slight extension)
- Bring your legs as far up as you can into the position they’d be when you squat without flexing your lumbar spine
- When in this position, feel your hamstrings with your hands
- Now do a reverse curl where you lift your pelvis off the floor using your abs and feel your hamstrings again
If they’re tight, they’ll feel the same as when you do a hamstring stretch.
If this is the case, you have SUPER tight hamstrings that might be contributing to butt wink and need to be addressed.
But if you’re like myself and everyone else who I’ve had perform this test, you’ll see that your hamstrings aren’t tense at all in either Step 3 or 4.
So let’s just rule out hamstring flexibility as the chief cause of butt wink and we’ll come back to this later, because right now we’ve got more myths to bust.
Squat Myth #4
Brace Your Core Tight Whenever You Squat
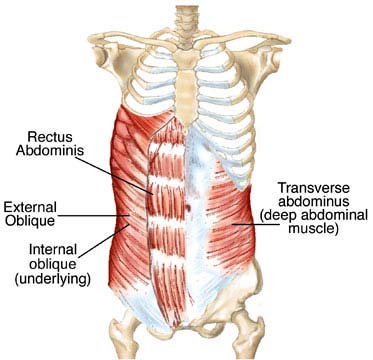 I love working with clients who have had trainers in the past.
It always helps justify in the client’s mind why I charge significantly more than the average trainer.
I was assessing one such client and I asked him to do a simple bodyweight squat and saw that he got really tight in the core before going down – the kind of tight you get when you’ve eaten too many protein bars and you’re sitting there working at it but things still aren’t moving.
“What did you do right there before you started the squat?” I asked.
“I tightened up my core to protect my back.”
Ah so!
This is a common cue given to people when they Squat, but it’s problematic because the nuance has never been properly taught.
Yes, bracing the core is an effective strategy to help keep your lumbar spine in neutral and add core stability.
However, here’s the key point: the amount of bracing used should be relative to the amount of stability needed.
This is a critical concept to understand and applies to every exercise where core stability is required.
If you’re doing a bodyweight squat, you don’t need much core stability whereas if you’re doing a 1 rep max, you need a lot and should brace appropriately.
If you’re doing a plank, you only need as much activation as necessary to maintain position – if you consciously contract your abs as hard as you can, you’re creating an inefficient motor program since the level of activation exceeds the demands of the exercise.
If you’re just a fitness buff, then it’s not such a big deal if you try to contract maximally during an exercise that doesn’t require it.
But if you’re an athlete that participates in any team sport where you’ve got to react in the moment (basketball, hockey, football, soccer), you need to develop your ability to unconsciously create the proper movement pattern and if you’re always consciously overriding it, you’re working against this unconscious competence development.
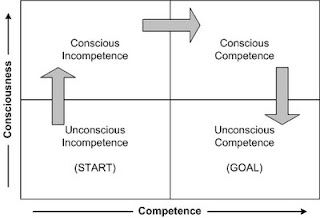
So the point of me talking about this is to teach you that to move efficiently, to move PRECISELY, you want to use the amount of muscular contraction needed to properly execute the technique and no more – because any more is a waste of energy.
Squat Myth #5
Don’t Let Your Knees Go Over Your Toes
If you believe this myth, you will NEVER get into a deep squat position because it’s impossible to get in a deep squat without the knees traveling past the toes.
And unless you’ve got an extremely short femur, it’s near biomechanically impossible to achieve a decent depth without this happening, especially when doing a back squat.
When you do a back squat, the bar must always be over your feet, otherwise you’ll lose your balance.
Here’s a simple diagram, where I used the exact same limb lengths for both models and just changed the angles to show you what keeping the knees behind your toes looks like:
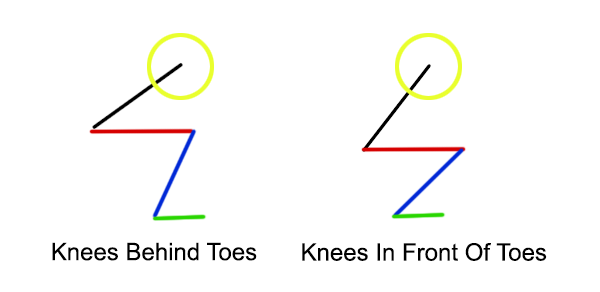
The yellow circle represents a weight plate, so the centre of this circle is the barbell.
As you can see, when forced to keep your knees behind your toes, you must go into significantly more hip flexion than knee flexion and the movement looks more like a Deadlift than a Squat.
When the knees are allowed to travel forward, the amount of hip flexion and knee flexion is very similar.
This means more glutes/hamstrings/low back activation and less quad if you’re doing the knees behind toes version.
Not right or wrong, just different.
The problem is that you’ll never go any deeper than parallel keeping your knees behind your toes.
Watch me alter the above diagram in Photoshop so you know the limb lengths don’t change to show you what it would look like to be in a deep squat position with your knees behind your toes.
If that video alone didn’t make this blog post worth your time, well, we can’t be friends.
“But it’s safer for the knees if they don’t go past the toes!” you may have heard.
If you’ve heard this, refer back to the previous “All Lumbar Flexion/Butt Wink is BAD” myth for my philosophical thoughts on this, but the bottom line is that very few exercises are inherently safe or unsafe – how safe a movement is is determined on the person’s readiness to do that movement.
But to further illustrate this point, let’s go through a thought exercise and assume that when we’re kids, we’re born with perfect mobility…
And let’s assume that a kid is being trained as early as possible to do an exercise that requires a deep squat position, such as a Clean & Jerk.
Thus, their mobility won’t restrict them.
If our goal is to build them up to become an Olympic champion, they need to do the technique properly, otherwise they’ll never make it.
So what do you think, would we train them to keep their knees behind their toes?
Well, we don’t have to assume.
Let’s just take a look:
This kid is 8 years old, weighs 95 pounds and did a Clean & Jerk with 165 lbs, with his knees going way past his toes at the bottom of the squat.
Biomechanically there’s no way he could get his bum to heels if he tried to keep his knees behind his toes and his knees didn’t explode, did they?
So again, if you’ve never trained the range of motion of your knees going past your toes when you squat, you might want to start off by doing bodyweight only.
Then, you can work your way up – here’s an example of me doing a 1RM test, where I hit 265 pounds on the Back Squat, knees going well past the toes (and proud of it):
Even if you’re currently squatting with hundreds of pounds, if you’ve been doing so with your knees behind your toes, you need to start light because the passive tissues will be stressed in a different way that they’re not adapted to and you don’t want to injure them.
Key Takeaways to Squat for Health and Performance
So, you’re still here on your computer or phone and you’ve read everything up to this point and because of it, the following myths about squats have been busted:
- There’s a “RIGHT” way to squat
- Butt wink and/or lumbar flexion is bad
- Butt wink is all about hamstring flexibility
- Brace your core tight whenever you squat
- Don’t let your knees go in front of your toes
This is awesome and with respect to knowledge about how to squat, reading this article puts you ahead of 99% of people who do squats in their workouts, which is pretty much everyone who works out.
Cool.
Now, I just want to make sure you get those other key points that I shared within the article that I don’t want you to miss:
- Be suspicious of black and white rules in fitness (and life in general)
- It’s not just muscles, passive tissues can and should be strengthened too
- Passive tissues must be strengthened slowly and conservatively
- The amount of muscle activation you generate should be relative to the need of the movement or technique, otherwise you’re building a dysfunctional motor pattern
That’s enough for today.
I’ve spent upwards of 8 hours writing and assembling this article for you because it’s my mission to “Empower you to move with PURPOSE and PRECISION” and I hope I’ve achieved that goal and with the depth and explanations I’ve provided, I’m sure you understand more about squats than before you read it.
But wait, there’s more!
FIRST, I don’t want you to leave empty handed, so I’d like to hook you up with the a great Squat Warmup Mobility Routine.
Just click the button below, enter your details and it’s yours along with a handy PDF cheatsheet showing all of the exercises (you won’t be taken off this page, so go ahead and do it now so you don’t forget):
The second thing I’ve got for you is a video where I answer questions I received from my powerDOJO VIP Newsletter Subscribers that I gathered as I was writing this article to ensure I covered the most popular questions from my practitioners.
All About Squats [VIP QnA]
So that’s it.
Blog post done.
I hope you’ve enjoyed it.
I’d appreciate if you shared this post using one of the options below to help me get this article out to people who could also benefit from it.
Talk soon,
PEACE~
Eric

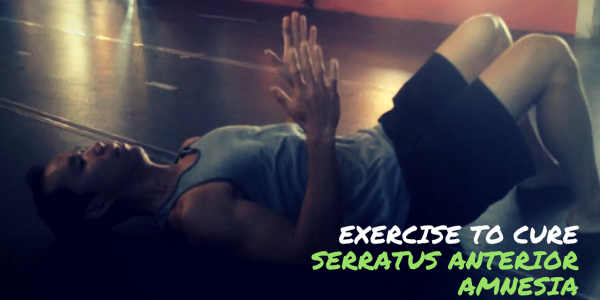
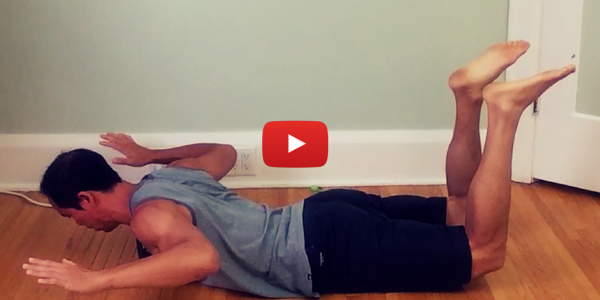
 Its most commonly discussed function is protraction of the scapula, which is why it’s often trained with the Scap Pushup (aka Pushup Plus), which is when you get into a Pushup position and protract your scapulae by pushing yourself away from the ground without bending your arms.
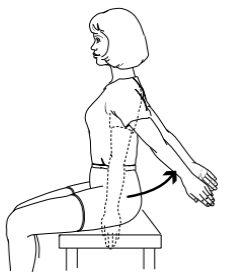 Shoulder extension is when you lift your arms behind your back in the sagittal plane.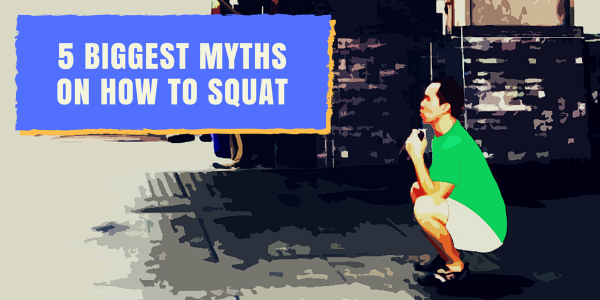

![NEW Scapula Stabilizer Activation Drill [VIDEO]](https://www.powerdojo.com/wp-content/uploads/2016/07/Scapula-Stabilizer-Activation-Drill-Vid-2-600x300.png)