Category: Increase Flexibility

  • Patellar Tracking Disorder | Shoulder Rehab | Sitting Exercises for Hip Mobility

    Patellar Tracking Disorder | Shoulder Rehab | Sitting Exercises for Hip Mobility

    Here’s what I’ve got for you on PMc this week:

    1. A thorough guide on what Patellar Tracking Disorder really is and why fixing this issue won’t help your knee pain.
    2. How do rotator cuff injuries happen and some effective exercises to rehab an injured shoulder.
    3. 4 awesome Hip Mobility exercises you can do WHILE sitting – so if you’re feeling too lazy to get up and exercise, you don’t have an excuse 😉


    New PMc Article #1:
    The TRUTH About Patellar Tracking Disorder

    patellar-tracking-disorder-human-kneeAre you experiencing persistent knee pain? Learn what’s actually causing your pain and why treating Patellar Tracking Disorder won’t help with this.

    Read More >>

    New PMc Article #2:
    Top 6 Supraspinatus Exercises for Rehabbing an Injured Shoulder

    An injured shoulder is no joke. It can hinder your ability to lift your arm and perform even the most simple day-to-day activities. These 6 supraspinatus exercises are a great way to rehab your shoulder so you can safely speed up the healing process and prevent re-injuries.

    Read more >>

    New PMc Article #3:
    4 Hip Mobility Moves to Do When Sitting

    hip mobility exercises while sittingSpending hours sitting down at your desk is likely causing your low back pain and movement limitations. Here are 4 simple hip mobility exercises you can do to address these issues (you can even do these while sitting down at work!).

    Read More >>

    Got any questions? Leave them in the comments below.
  • Best Hip Stretches for Runners | Treat Subacromial Bursitits

    Best Hip Stretches for Runners | Treat Subacromial Bursitits

    I’ve got 2 new articles for you on PrecisionMovement.coach, covering:

    1. The Best Hip Stretches for Runners – learn why running and tightness go hand in hand and what you can do to prevent that.
    2. How to Treat and Prevent Subacromial Bursitits – what causes subacromial bursitits and a 5 step plan to keep your shoulders healthy and free of pain.

    New PMc Article #1:
    The 5 Best Hip Stretches for Runners

    hip stretches for runners

    Do you love running but you can’t fully enjoy it because of pain and mobility limitations? Read this article to find out how running leads to hip flexor tightness and how you can train your body more efficiently for running.

    Read More >>

    New PMc Article #2:
    5 Step Plan to Treat and Prevent Subacromial Bursitis

    If you’re dealing with subacromial bursitis, there are a few ways you can get rid of that restrictive pain and discomfort in your arms. Learn what’s causing this issue first and follow my 5-step plan to treat and prevent subacromial bursitis.

    Read More >>

    Got any questions? Leave them in the comments below.
  • New Site for Pain, Injuries and Flexibility Problems

    New Site for Pain, Injuries and Flexibility Problems

    I’ll be taking a break from posting new content here on powerDOJO.com for a while as I focus on building up PrecisionMovement.coach – my new site that will be all about helping you with pain, injuries and flexibility problems.

    There are already over 10 blog posts to help you out and we’re adding 2-3 new articles every week including articles to help you recover from low back pain and sciatica, improve your posture, loosen tight hamstrings, fix chronic musculoskeletal pain and more.

    www.PrecisionMovement.coach

    New assessments and questionnaires will also be published to help you figure out the root cause of your problems and thus, help you get to a PERMANENT solution instead of just applying band-aids when issues surface.

    I look forward to continuing this never-ending journey of improving the way we move together.

    – Coach E

  • New Crawl Exercise for Squat & Hamstring ROM

    New Crawl Exercise for Squat & Hamstring ROM

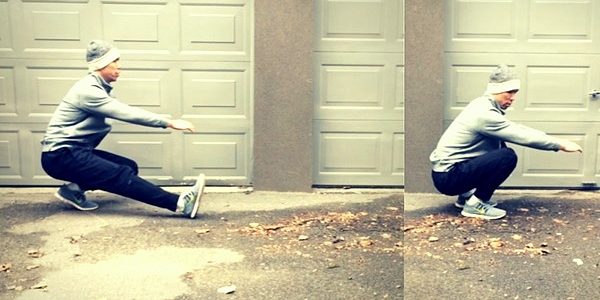
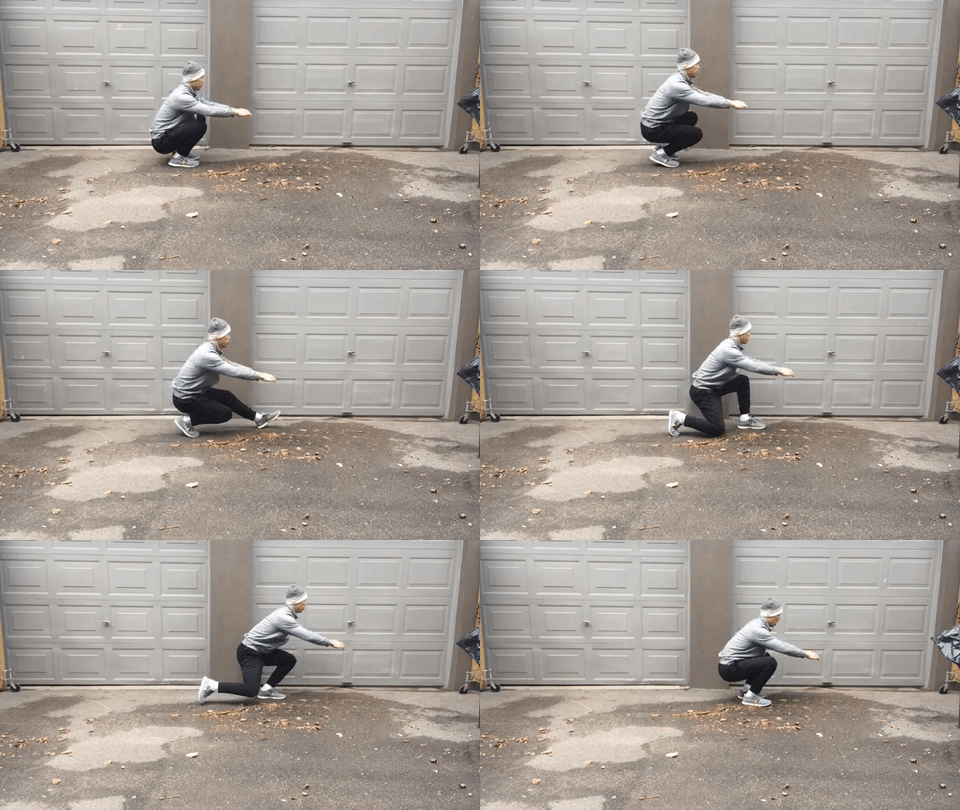
    Today, I’ve got a new crawl exercise for you that I call the Forward Squat Crawl that provides 2 major benefits:

    1) Cement a deep and stable bottom squat position

    2) Lengthen your hamstring ROM

    A bonus benefit is it might also make you feel like an assassin.

    Work up to 2-3 sets of 6 reps per but focus on QUALITY, not quantity, so even if you do just 1 rep per side properly, that’s better than 6 done poorly.

    Please try the exercise then let me know how it feels i.e. where it feels restricted, what muscles are working, any cramping etc.

    Technique Cues
    1. Get into a deep squat with neutral spine – if you have to put your hands on the ground or lift your heels to maintain neutral, do it
    2. Staying low, reach forward with one leg to crawl forward
    3. Actively drag yourself forward with the lead leg, firing up the hamstrings
    4. Go slowly with controlled movements and breathe

  • Technique for Overhead Mobility and Bad Posture

    Technique for Overhead Mobility and Bad Posture

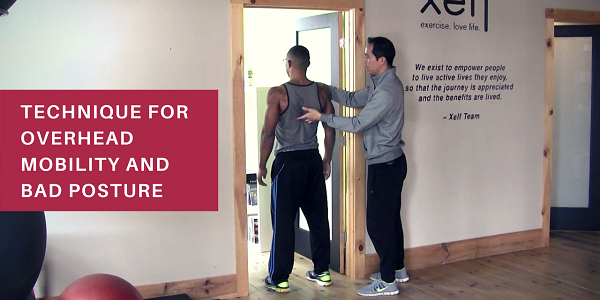
    I cannot overstate the importance of working on your posture, especially when I walk around the city and see people like this:

    posture

    What’s even worse is when I am one of these people!

    That’s why today’s drill and other exercises like this that address your thoracic spine and shoulders  are important to do on a daily basis.

    Because if we do exercises like this just once a week, it cannot compete with the daily onslaught our bodies experience as a result of computers, driving, TV and cell phones.

    For best results, do 2-3 sets with the first right in the doorway before making your way in a bit deeper doing 6-10 reps each set. And don’t forget to BREATHE!…

    If you’re looking for a 15 minute routine to do daily to reverse or prevent bad posture and shoulder tightness, check out the Shoulder Flexibility Solution here.


  • Exercise for Wrist Pain, Strength & Flexibility

    Exercise for Wrist Pain, Strength & Flexibility

    Wrists are generally a low priority on people’s lists of areas to train, if they’re trained at all.

    “Wow you’ve got really nice wrists!” said nobody, ever.

    But the thing is, your wrists are often a weak link and if you’ve got wrist pain, you’re limited from so much, from exercises in the gym to sports to wrestling with your 2 year old daughter who has a black belt in squirm-jitsu.

    Plus, our wrist flexors are trained so much whenever we hold something heavy, whether it’s a barbell during Deadlifts or a bar during Chinups, so we often have a strength imbalance between wrist flexors (strong) and extensors (weak), which results in limited extension.

    The last time my wrist was injured, I had to take a break from all floor based upper body work like Pushups and Handstands because I couldn’t put my wrist into extension, which was a major bummer.

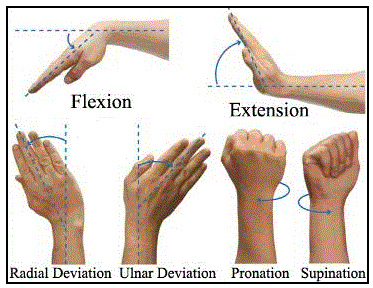
    After the injury was healed, I was limited in wrist extension, so had trouble with handstands since the wrist is at 90° of extension when in one.

    wrist-movements

    And it wasn’t just the flexibility that was the issue, it was also the strength in that end range that really limited my ability in the handstand since as anybody skilled in handstands knows, the hands are very active in helping maintain balance.

    So I had to come up with something to help me get back to normal function so I could resume pursuing my goal of a 60 second free handstand and today’s exercise was paramount in regaining both the strength and flexibility needed.

    This drill follows my 3D Flexibility System in that we’re building strength in the end range to gain “useable flexibility”, not just passively stretching/mobilizing the wrist into the end range.

    The first few times you do this it’ll likely feel uncomfortable, but stick with it because this is how you gain flexibility that lasts.

    Do anywhere from 3-6 reps per wrist and you can throw it in pre or post workout or anytime, really. Doing it a couple of times a day is fine as well, but at least 3 times/week to get good results.

  • The Deep Squat Wall Walk

    The Deep Squat Wall Walk

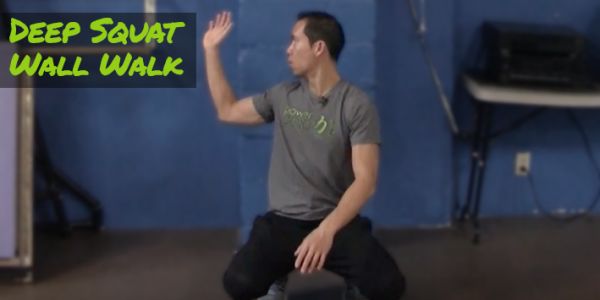
    In today’s drill that I call the Deep Squat Wall Walk, we’re going to bring together the 2 separate elements that we worked on in the previous 2 posts on the blog (Deep Squat Pivot, T-Spine Exercises), which are deep squat mobility and thoracic spine extension.

    This is an example of how we progress techniques – we build basic levels of ability separately, then put them together.

    This also increases efficiency since we’re essentially killing 2 birds with one stone.

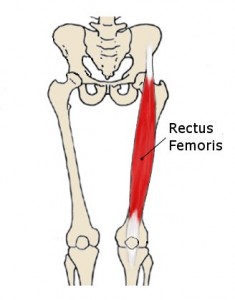
    So we’re going to build strength out of the deep squat position today, specifically targeting the rectus femoris, which is a 2-joint muscle that causes hip flexion and knee extension.

    rectus-femorisThe rec fem is a muscle that is not thought of much and when we do think of it, the common thought is that it’s always tight and needs to be stretched.
    But as I’ve been trying to hammer home over YEARS – flexibility and mobility is not just about stretching and lengthening tissues – it’s more about building strength in new (end) ranges of motion.

    This is true especially as we get older…

    …because tightness often occurs as a response to muscle weakness to increase joint stability and if we just stretch without restoring strength, we’re actually decreasing joint stability which is counter to the goals of our nervous system (stable, safe and healthy joints).

    So this exercise is going to help build strength in the rec fem and other quad muscles out of the end range of knee flexion, as well as improve overhead shoulder mobility and thoracic spine extension.

    Go for anywhere from 4-10 reps pre or post workout and you’re good to go.

    And before you go I’m wondering – do you have any specific pain right now that impairs or prevents you from exercising?

    If so, let me know what it is below as I’m gathering ideas for future videos.


  • Get a DEEPER Squat With This Drill

    Get a DEEPER Squat With This Drill

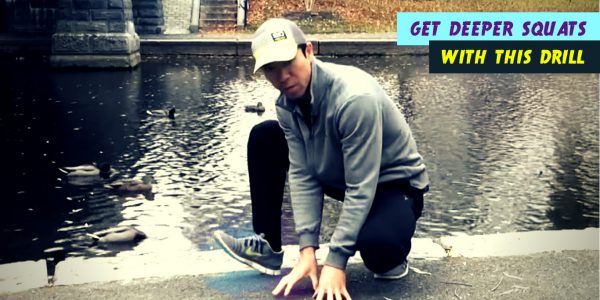
    Today’s video is going to improve your squat mobility.

    Yes, I can make such a bold claim, regardless of what you’ve done before, because I know the drill we’re going to go through includes elements I’ve never seen anyone else use to improve their squat range.

    Before we get to it, one element I’d like to highlight is how it’ll help you gain ankle dorsiflexion (pulling toes up towards knee), a common factor when limited that makes people feel like they’re going to fall backwards when in the deep squat.

    It’s not the only factor that contributes to this, but it’s definitely a common one.

    If you run or jump a lot or do any other high impact movements on your feet, your ankles take a beating.

    Over time, dorsiflexion deteriorates and because it’s not something most people (well, not peeps like you and me) think of training, it gets worse and worse where it can ultimately result in a compensatory movement and injury.

    The thing is, the injury will often occur elsewhere, such as at the knee or hip.

    But because the root cause is limited ankle range, it’s never addressed and you might go on for years and years hurting yourself and treating symptoms while feeling frustrated and hopeless not being able to do what you want to do.

    That’s why keeping tabs on things like ankle dorsiflexion is important and this drill will help you not only keep tabs on it, but MAXIMIZE it so it never causes an issue.

    That’s just ONE of the benefits of this drill and it’s why it’s a new staple in my warmup.

    So let’s get to it, shall we?

    Follow-along then let me know how it felt in the Comments when you’re done.

    By the way, the approach used in this drill is just one reason why my Hip Flexibility Solution has proven so effective.

    Click here for the complete scoop on the Hip Flexibility Solution.

  • 2 Exercises to Fix Your Stiff T-Spine

    2 Exercises to Fix Your Stiff T-Spine

    Your spine is designed to move…

    Well, maybe not if you’re dressing up as Frankenstein today for Hallowe’en, but every other day your spine should be doing what it’s made to do.

    frank

    If the spine was designed to be like a stiff rod, there wouldn’t be 7 cervical, 12 thoracic and 5 lumbar vertebrae that can move in every plane of motion through flexion/extension, side bending and rotation.

    Instead, we’d simply have a single bone, like other body segments that aren’t supposed to move such as the femur and humerus.

    But no, we’ve got a spine made up of many different
    joints that are ALL designed for MOVEMENT.

    Modern day life has our spine either straight or flexed most of the time and because we spend so much time there, our bodies adapt and adopt it as the norm, hence all the people who like depressed with their hunch backs walking around.

    And because we don’t use our ability to extend and rotate our spines, we lose it.

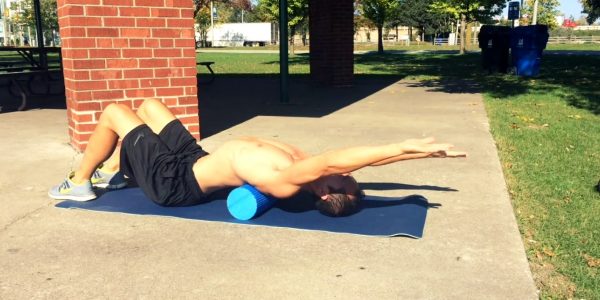
    Well, the 2 new exercises I’m sharing with you today that use the foam roller (something we should all have at home) will help you get your extension back.

    The first drill gets you to your full thoracic extension (whatever that may be for YOU), then builds strength there, specifically in the spinal extensors like the multifidus and those little-known spinalis and longissimus muscles.

    That’s how you gain and keep new ranges of motion: you build strength at that range.

    This is a critically important point, hence the bolded text.

    If you simply achieve a new range of motion through stretching, you will quickly lose it because without strength in that range, your central nervous system (CNS) sees that range as weak and unstable and any range that’s weak and unstable is a risk for injury, which your CNS doesn’t want (it likes you, it really likes you).

    That’s one of the concepts at the core of my Hip Flexibility Solution and Shoulder Flexibility Solution programs.

    The second drill will build active strength to get you to your full range of thoracic spine extension by actively contracting the lower and middle traps and rhomboids, which will also result in co-contraction of the deep spinal extensors.

    It’s these deep spinal extensor muscles we’re targeting that will help us gain new T-spine extension, especially since you’ve probably never worked them before.

    So that’s the background for you so you understand what we’re doing and why – now that you know what’s up, give it a shot:

    Exercise #1: 1-2 sets x 10 reps

    Exercise #2: 1-2 sets x 4-6 reps with a 3 sec hold

    What do you think of this video style, where I do a voice over instead of talk?

    It’s a little experiment I tried – it takes more time/work and I’m not sure I want to do it that way anyway, but I’m wondering what you think or if you have any other suggestions on how I do my vidz.

    Let me know in the Comments – I’d love your feedback.

  • Gain Overhead Mobility with THIS Technique

    Gain Overhead Mobility with THIS Technique

    Overhead mobility is becoming more and more of an issue for many, whether you want it to do Snatches, Overhead Presses or Pullups, or regular tasks like getting stuff off the top shelf or putting a carryon into the overhead compartment on an airplane.

    If you’ve got pain when you reach your arms up overhead, you could be suffering from bursitis or tendonitis and these inflammatory conditions are typically the result of one or a combination of the following 4 problems:

    1) Poor thoracic spine mobility
    2) A super tight pec minor
    3) Dysfunctional movement patterns
    4) Weak scapular muscles, particular the serratus anterior and lower trap

    Today’s technique is that it can help address the last 2 problems, which is why I recommend you do some T-spine mobility work and release the pec minor before you try it out.

    To not leave you hanging, I searched my YouTube channel to see what I’ve posted for the T-spine and found this classic (look at that full head of hair!):

    And here’s a video I posted recently to release your pec minor and activate your serratus anterior:

    Oh and one more thing to ensure I’m being a responsible coach, prep those wrists before hand using the 3 techniques in this vid:

    Once you’ve done the prep work, give this a shot and make sure you ELEVATE your scapulae and keep your elbows locked out while breathing naturally (as best you can):

    Aim for anywhere from 10-30 second hold times, ensuring you’re actively elevating your scapulae throughout and do a total of 2-4 minutes of work to help cement this range of motion into your CNS.

    Do you have pain or trouble with overhead mobility?

    If so, tell me what it limits you from doing in the Comments below.