Author: Eric Wong

  • New Site for Pain, Injuries and Flexibility Problems

    New Site for Pain, Injuries and Flexibility Problems

    I’ll be taking a break from posting new content here on powerDOJO.com for a while as I focus on building up PrecisionMovement.coach – my new site that will be all about helping you with pain, injuries and flexibility problems.

    There are already over 10 blog posts to help you out and we’re adding 2-3 new articles every week including articles to help you recover from low back pain and sciatica, improve your posture, loosen tight hamstrings, fix chronic musculoskeletal pain and more.

    www.PrecisionMovement.coach

    New assessments and questionnaires will also be published to help you figure out the root cause of your problems and thus, help you get to a PERMANENT solution instead of just applying band-aids when issues surface.

    I look forward to continuing this never-ending journey of improving the way we move together.

    – Coach E

  • 3 Steps to Better Glute Activation During Deadlifts

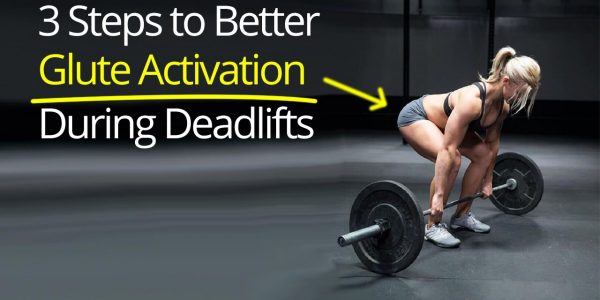
    3 Steps to Better Glute Activation During Deadlifts

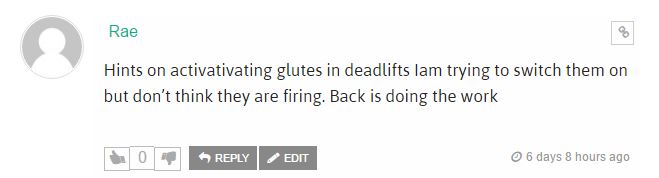
    I recently got this question about glute activation from a VIP subscriber:

    deadlift-question

    This is a very common situation people find themselves in because our glutes are often sleepy because we sit on them all day and it’s particularly difficult to get the glutes firing during Deadlifts.

    There’s another point about glute activation that relates to your hip flexors that a lot of people don’t know, but we’ll cover this after the video.

    Speaking of which – the 3 step approach I outline in the video will help get sleepy glutes firing again and you can apply the same philosophy behind the approach to help get ANY muscle group that’s not firing to work better.

    So if you’ve got other muscles that don’t work properly, like your lats, rhomboids or even your obliques – you can use the same thinking to achieve your goal.

    Check it out now:

    To summarize the 3 steps to better glute activation during Deadlifts:

    1. Get the glutes SORE, so you can easily feel them working when Deadlifting. I suggest doing Bulgarian Split Squats to achieve this. Do 3-4 sets of 10-12 reps per leg.
    2. When your glutes are sore, do some Deadlifts, but start with 2 specific activation exercises, the 4 Point Hip Extension (open chain) and the Wall Hip Bridge (closed chain). Do 4-6 reps and hold for 5 sec, squeezing those glutes hard. It’s also fun to explore other movements and how they feel when your glutes are already sore, for example – Squats.
    3. Get into your Deadlifts and start just with the hinge movement while focusing on glute activation. Slowly ramp up and only go as high as you can while maintaining glute activation. It may be lower than your max, but if your goal is glute activation, this is the way to go and you’ll progress from here.

    Now, let’s go into what I I mentioned about sleepy glutes and hip flexors – if your glutes aren’t firing properly, you’re likely going to have tight hip flexors.

    The reason why is because your glutes create hip extension and when they don’t function properly, you’ll lose this hip extension and the hip flexors will compensate and tighten up.

    The old “use it or lose it” principle.

    When your glutes are firing well and you can go into full hip extension, your hip flexors get STRETCHED to their limit and this helps maintain full range of motion.

    Make sense?

    This is part of the reason why the Hip Flexibility Solution program works so well to loosen up tight hips – because it’s based on building flexibility through greater strength in the end ranges of motion.

    If you have tight hips, you’ll have to address the problem holistically, otherwise you’ll constantly be frustrated because you’ll stretch until the cows come home but will never gain any lasting results.

  • Exercise for Wrist Pain, Strength & Flexibility

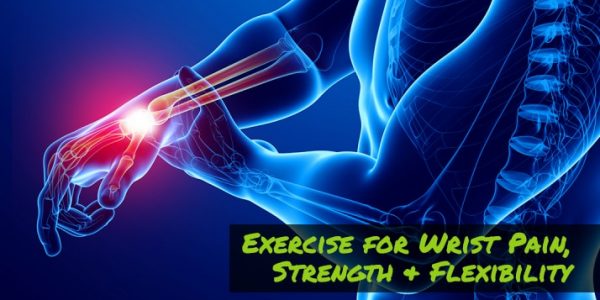
    Exercise for Wrist Pain, Strength & Flexibility

    Wrists are generally a low priority on people’s lists of areas to train, if they’re trained at all.

    “Wow you’ve got really nice wrists!” said nobody, ever.

    But the thing is, your wrists are often a weak link and if you’ve got wrist pain, you’re limited from so much, from exercises in the gym to sports to wrestling with your 2 year old daughter who has a black belt in squirm-jitsu.

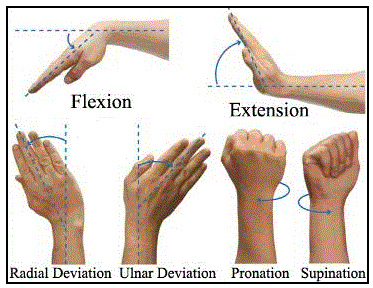
    Plus, our wrist flexors are trained so much whenever we hold something heavy, whether it’s a barbell during Deadlifts or a bar during Chinups, so we often have a strength imbalance between wrist flexors (strong) and extensors (weak), which results in limited extension.

    The last time my wrist was injured, I had to take a break from all floor based upper body work like Pushups and Handstands because I couldn’t put my wrist into extension, which was a major bummer.

    After the injury was healed, I was limited in wrist extension, so had trouble with handstands since the wrist is at 90° of extension when in one.

    wrist-movements

    And it wasn’t just the flexibility that was the issue, it was also the strength in that end range that really limited my ability in the handstand since as anybody skilled in handstands knows, the hands are very active in helping maintain balance.

    So I had to come up with something to help me get back to normal function so I could resume pursuing my goal of a 60 second free handstand and today’s exercise was paramount in regaining both the strength and flexibility needed.

    This drill follows my 3D Flexibility System in that we’re building strength in the end range to gain “useable flexibility”, not just passively stretching/mobilizing the wrist into the end range.

    The first few times you do this it’ll likely feel uncomfortable, but stick with it because this is how you gain flexibility that lasts.

    Do anywhere from 3-6 reps per wrist and you can throw it in pre or post workout or anytime, really. Doing it a couple of times a day is fine as well, but at least 3 times/week to get good results.

  • The Deep Squat Wall Walk

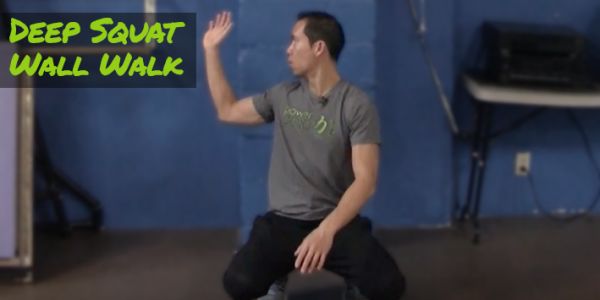
    The Deep Squat Wall Walk

    In today’s drill that I call the Deep Squat Wall Walk, we’re going to bring together the 2 separate elements that we worked on in the previous 2 posts on the blog (Deep Squat Pivot, T-Spine Exercises), which are deep squat mobility and thoracic spine extension.

    This is an example of how we progress techniques – we build basic levels of ability separately, then put them together.

    This also increases efficiency since we’re essentially killing 2 birds with one stone.

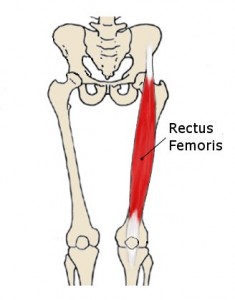
    So we’re going to build strength out of the deep squat position today, specifically targeting the rectus femoris, which is a 2-joint muscle that causes hip flexion and knee extension.

    rectus-femorisThe rec fem is a muscle that is not thought of much and when we do think of it, the common thought is that it’s always tight and needs to be stretched.
    But as I’ve been trying to hammer home over YEARS – flexibility and mobility is not just about stretching and lengthening tissues – it’s more about building strength in new (end) ranges of motion.

    This is true especially as we get older…

    …because tightness often occurs as a response to muscle weakness to increase joint stability and if we just stretch without restoring strength, we’re actually decreasing joint stability which is counter to the goals of our nervous system (stable, safe and healthy joints).

    So this exercise is going to help build strength in the rec fem and other quad muscles out of the end range of knee flexion, as well as improve overhead shoulder mobility and thoracic spine extension.

    Go for anywhere from 4-10 reps pre or post workout and you’re good to go.

    And before you go I’m wondering – do you have any specific pain right now that impairs or prevents you from exercising?

    If so, let me know what it is below as I’m gathering ideas for future videos.


  • Exercise to Strengthen Scapular Stabilizers + Stretch Pecs

    Exercise to Strengthen Scapular Stabilizers + Stretch Pecs

    The title of this post says it all…

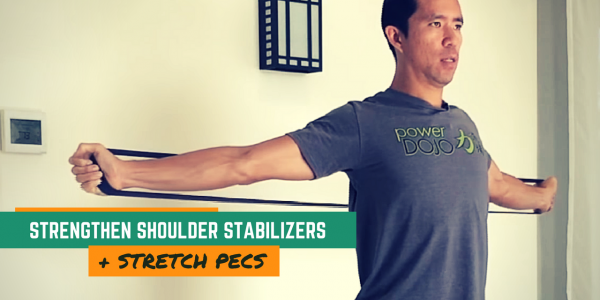
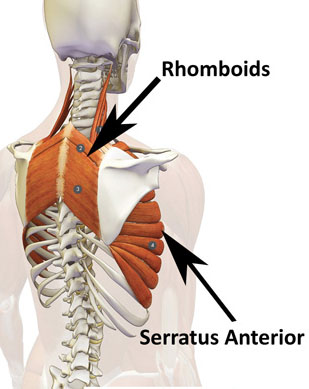
    This exercise primarily strengthens your serratus anterior and rhomboids, two muscles that are crucial to scapular stability and shoulder health.

    These 2 muscles work together to keep the scapula flush to your ribcage and prevent winging.

    Look at the image below and you’ll see that these muscles have the same line of pull and essentially blend into one another, with the rhomboids anchoring the scapula to the spine and the serratus anterior anchoring the scapula to the ribcage.

    rhomboids-serratus

    When they both contract, they pull the medial border of the scapula tight to the body, which is what we need to happen for a stable shoulder joint.

    The exercise we’re doing today works both of these muscles at their shortened end range of motion while the pecs also get a great stretch.

    Give it a shot and let me know how it feels:

  • The Scap Step Up: Shoulder Control + Core Stability

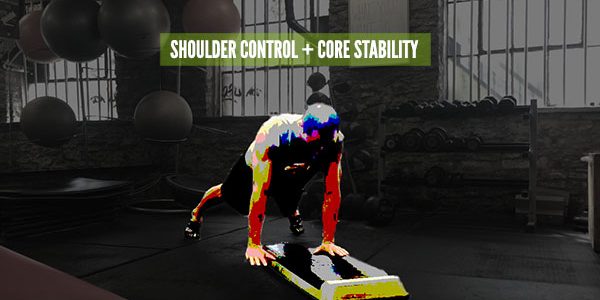
    The Scap Step Up: Shoulder Control + Core Stability

    Today’s exercise builds off of the last post I shared on the blog (Exercise to Cure Serratus Anterior Amnesia), which got some great feedback from Mike who said:

    “I did it and my shoulders feel much looser and
    almost gave me like a warmed up looseness…”

    Immediate looseness like Mike experienced happens when you activate stabilizer muscles (i.e. the serratus anterior) because your central nervous system sees that the joint is stable and can let go of protective tightness, which guards a joint from injury when no stability is present.

    It’s like when you’ve got a powerful urge to do a #2 but there’s no toilet in sight – you clench up your glutes and sphincter and all the muscles down there to protect you from making a poopie in your pants (and the associated shame and embarrassment).

    Same thing happens at every joint in your body including the hips, spine, ankles, etc.

    I guess your anus isn’t really a joint, but I digress.

    Let’s get back on track here.

    The Scap Step is a great exercise because it trains the following important elements:

    • Straight-arm strength (to counteract all the bent-arm strength training that’s mostly done)
    • Unilateral serratus anterior strength and control through the full range of protraction/retraction
    • Integrated diagonal core stability (rotational power anyone?)

    And more, which you’ll discover in the video:

    Do anywhere from 4 reps on each side if you’re going for activation as part of a warmup or multiple sets of up to 10 reps per side if you’re trying to build strength-endurance.

    I also recommend you do the sequence from the last post FIRST, as it’ll release the naughty pec minor and get the serratus anterior activated at a low level before jumping into the Scap Step Up, which is a higher intensity drill when done correctly.

  • 7 Tips to Minimize Pain and Speed Healing

    7 Tips to Minimize Pain and Speed Healing

    Pain is often a signal that we’re taught to ignore…

    Messages like “No pain, no gain.” or “Stop being such a pussy!” are common in the world of sport and sure, achieving excellence in sport sometimes requires athletes to temporarily disregard pain.

    But the keyword there is “temporarily” because ignoring pain forever will only result in more pain in the future.

    For those of us who aren’t professional athletes or aren’t trying to win medals, the sooner we can deal with pain, the better.

    So here are 7 tips to help you minimize bodily pain and speed healing.

    Tip #1: Adopt the “PIC” Principle

    You’ve probably heard of RICE – Rest, Ice, Compression and Elevation to deal with acute pain, acute being within 7 days of doing something that causes pain and/or an injury).

    Instead of RICE, this is a better strategy to speed up healing:

    P – Pain-Free Movement
    I – Ice
    C – Compression

    As you can see, I suggest you drop the idea of rest in favour of pain-free movement, ideally with the affected area but if that’s not possible, just moving whatever way you can without pain.

    The more you move, the more circulation occurs and the faster the healing.

    This is most important for joints, because the only way that joints receive nutrition and can heal is through movement, so the quicker you can give it what it needs, the better.

    It could be passive movement (i.e. someone else moves your affected joint or you use gravity somehow) or active movement where you move the joint under your own strength, but make sure this movement doesn’t elicit pain, otherwise you’ll create a dysfunctional movement pattern.

    I’ve also dropped elevation because I’ve found it doesn’t help that much and is typically impractical, but if you can do it, it won’t hurt.

    Tip #2: Avoid Refined Foods

    Drop refined foods from your diet, especially sugar, high omega-6 vegetable oils (soy, canola, sunflower, safflower) and flour.

    don't eat these

    These cause inflammatory effects in your body and can delay your healing.

    Plus, they’re just generally good things to avoid, so your overall health will improve as well.

    Tip #3: Take Fish Oil

    Taking around 3 grams of combined EPA+DHA (not 3 grams of fish oil total) will help decrease achy joints and blunt inflammation.

    My good friend, MMA and BJJ stud Jeff Joslin swears by this as when he takes it, he can train hard multiple times a day without joint pain but notices the pain when he’s not on it and I’ve noticed the same thing.

    The key is going for the combined EPA+DHA, not total amount of fish oil.

    I suggest liquid form with good brands being Carlson, Nordic Naturals and Ascenta – if you’re using these brands, it’s about 4 tsp a day.

    fish

    Or if you’ve got the skills to feed yourself with fresh fish daily, do so. 😉

    Tip #4: Eat More of These 3 Foods

    Leafy greens, blueberries and garlic are tops for fighting inflammation.

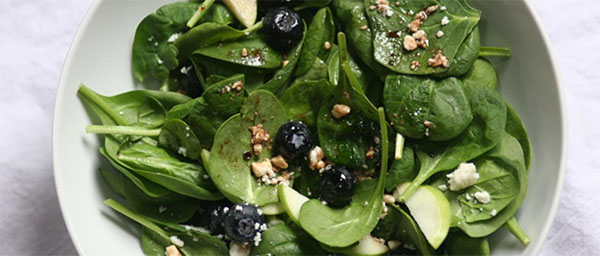
    For the most efficient method, I suggest can eating them all at the same time in a great salad by adding some garlic to lightly heated olive oil, stirring till fragrant, then add some honey and balsamic vinegar to make a tasty honey-garlic dressing that you can throw on a bed of greens and blueberries.

    anti-inflammatory-salad

    Make a big batch of the dressing ahead of time for even greater efficiency and feel free to throw some mixed nuts on top (but avoid the cheese as cheese is pro-inflammatory).

    Tip #5: Take a Turmeric Supplement

    purathriveI don’t use turmeric when I cook so I simply take a supplement when I have an injury, as it’s one of the most well-researched and proven anti-inflammatory and joint pain supplements out there.

    PuraThrive is the only turmeric supplement I’ve used and it’s a good one but feel free to look to other sources if you want.

    Definitely worth keeping in your cupboard because if you can start supplementing right away you can prevent the pain-cycle from messing up your movement patterns.

    Tip #6: Get Sufficient, Consistent Sleep

    First, you need the right amount of sleep for you, anywhere from 7-9 hours being typical for most people.

    This is important because you recover and regenerate when you sleep.

    And just as important, you want your sleep to be consistent.

    This means going to bed and waking up at the same time.

    Obviously if it’s your best friend’s bachelor party you’re not going to bed at 10pm, but do your best to get back on schedule as quickly as you can.

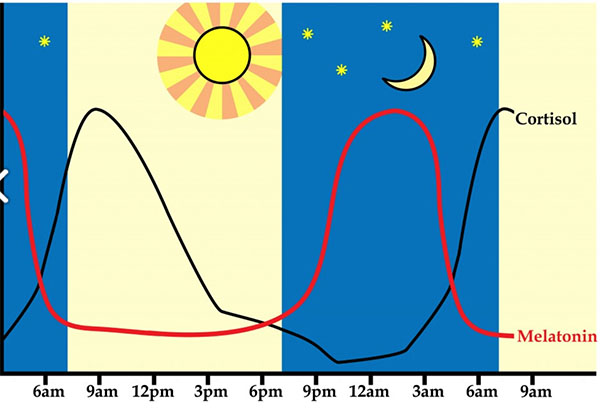
    Inconsistent sleep and wake times throws off your circadian rhythm, thus throwing your hormones out of whack.

    circadian-rhythm

    This can result in increased cortisol, which is the opposite of what your body needs to heal old and build new tissue.

    Tip #7: Decrease Your Overall Training Intensity/Volume

    If you’re training as if you’ve got a fight coming up and you’re not healing, there’s no wonder why.

    I find CrossFitters and runners to be the absolute worst with this – for some reason these athletes don’t know how to dial it back a notch, with CrossFitters always going hard on intensity and runners unable to give up volume.

    Tone it down for even a week to allow your body to divert some of it’s energy to healing and you’ll avoid plateauing your recovery process.

    There you have 7 tips to minimize pain and speed healing.

    Put them to work for you!

  • 67 Year Old Grandma Climbs Rope…

    67 Year Old Grandma Climbs Rope…

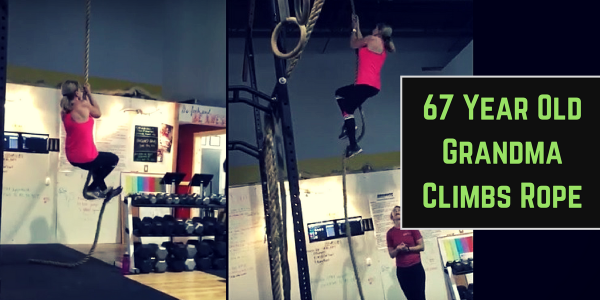
    Maggie is a 67 year old grandma who joined the powerDOJO Inner Circle just over a year ago.

    When she joined, she told me she could barely do Pushups from her knees.

    Well, now look at her:

    And this is just one of many new feats of strength that she’s been able to accomplish since joining.

    Her positive “CAN DO” attitude and willingness to ask questions combined with consistent effort (and I like to think some good programming) has kept her progressing and now she’s doing things many guys half her age can’t do.

    So, don’t doubt yourself or your abilities…

    Know that you have so much potential waiting inside of you to be revealed.

    All it takes is a positive attitude, consistent effort and a good plan.

    Now get out there and DOMINATE!

    Coach E

    P.S. Please feel free to congratulate Maggie below!

  • Grab this FREE Cookbook

    Grab this FREE Cookbook

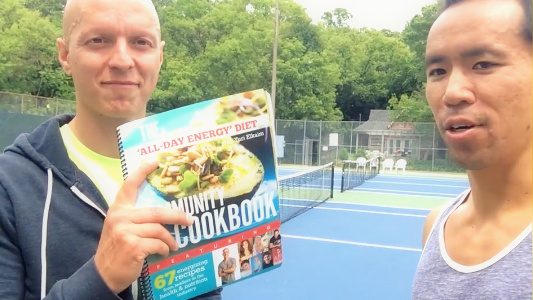
    My buddy Yuri just released a new cookbook and it looks great and you can get it for FREE.

    Watch the video below for details:

    Click%20Here%20to%20Get%20the%20’All%20Day%20Energy%20Diet’%3Cbr%2F%3ECookbook%20for%20FREE(Free%20offer%20ends%206%2F17%2F16)

    .

    .

    .

  • On Intermittent Fasting

    On Intermittent Fasting

    Since we’re at the (furry, white) tail end of Easter weekend, I figured this would be a relevant topic to cover…

    You’ve probably heard the term intermittent fasting, right?

    If you haven’t, it’s basically a way of eating that includes prolonged periods where you don’t eat any food, versus the traditional approach of eating 3 square meals a day or the “bodybuilder” approach of eating every 2-3 hours.

    As with any new dietary protocol, it’s popularity skyrocketed and was probably at its peak when when Rodale, publisher of magazines like Men’s Health, put “The 8 Hour Diet” on the marketplace a few years ago.

    Now if you go to Amazon and search for “fasting diet” or “intermittent fasting” you’ll find thousands of books…

    BARF!

    Most of these books are written by authors out to cash in on the latest diet craze but don’t give any new or solid info (this book on the other hand was first published in 2007 and has been updated numerous times over the years as new research has been published).

    And this is a big reason why I see people get messed up with respect to dieting, nutrition, a “healthy lifestyle”, or whatever term you want to use to refer to the act of putting food into your mouth then swallowing…

    It’s that they get caught up in the crossfire between all of these competing expert opinions, which causes confusion and paralysis by analysis.

    Once this happens, all hell breaks loose.

    Here are 2 keys to success with nutrition
    that tend to be forgotten

    The 1st key is to understand that we’re all individuals with a biochemistry as unique as our fingerprints.

    Science is on a quest to figure out exactly how we work but this will never happen (it’s still a worthy path) because we are way too complex and there are things that we will never be able to explain (nor would we want to) and too many variables interacting.

    And food is made up of so many chemicals and enzymes and vitamins and phytonutrients and our bodies have so many systems and cells and cellular reactions that trying to figure out exactly how our bodies are going to react to eating a certain food is impossible.

    I’ve learned this lesson with the experience I’m still going through with respect to my daughter’s eczema…

    She’s not out of the woods yet but has constantly improved and what we’ve all learned on this journey thus far is that no matter what rules or probabilities exist, an individual can react completely different to a food than those rules state.

    For example, we figured that coconut milk would’ve been good for her because it’s touted to carry all sorts of anti-bacterial and anti-fungal properties, but she flared when drinking it.

    Once you realize that there are actually no hard and fast rules, you’re FREE…

    You’re FREE to set your own rules and
    find what works best for you.

    That’s where books and information and advice helps – they inform you of rules to follow and give you a starting point – it’s then up to you to pay attention and tweak as you see fit.

    But what typically happens is that people shut their brains off, follow rules blindly and when things go awry, because they weren’t listening and paying attention (and probably only focused on one thing – the # on the scale), they ditch the diet completely and move on to the next one.

    Instead of taking the learnings and EVOLVING them in the next phase, they start over.

    This is the hamster wheel of dieting.

    So how do you get off the wheel?

    Follow the 2 keys – the first key we talked about already, which is to drop the notion of finding the perfect diet because no one diet can serve everybody perfectly.

    The 2nd key is to come up with a plan, do some research about it that you can to give you the understanding you need to move forward (but don’t go crazy), then commit to it for a period of at least 28 days.

    Follow the plan and pay attention to see how you’re responding.

    And don’t just limit your attention to a single variable like weight lost but pay attention to everything including your energy, sleep, how your stomach feels, your skin quality, mood, etc because if you lose weight but you feel and look like crap, then it probably won’t work too well for you long-term.

    After that, continue or tweak, but don’t totally ditch it unless it was a total failure.

    Make sense?

    Cool, so let’s talk about FASTING now…

    I’ve tried 2 approaches:

    1) My buddy Brad’s “Eat Stop Eat” protocol where you basically don’t eat anything for 24 hours once or twice a week.

    This experiment didn’t last long as my energy was low and I felt too hungry.

    It’s worked for many others but not for me.

    However, his book is the single best source of the latest scientific research on fasting available, covering not only research that supports his particular protocol, but also many others.

    2) The “LeanGains” approach by Martin Berkhan where you basically don’t eat breakfast and eat only within an 8 hour window (perhaps noon to 8pm).

    This worked great for me for a year or 2 until my daughter Livia arrived, then things changed and I felt that eating breakfast worked better for my body and new lifestyle.

    Nowadays, I typically eat 3 square meals and 1 or 2 snacks.

    I’ll throw in a 16/8 day here or there and if I eat like an absolute hog, like at big family get together, then I’ll probably fast until dinner the following day.

    I do think it’s a great idea to give your digestive system a break once in a while regardless of gluttony, so try doing a 24 hour fast in every once in a while.

    Outside of the physiological effects, the mental aspect of going without food for a 24 hour period may be just as important…

    Being able to feel the sensation of a hungry stomach but not be controlled by it, or get “hangry”, is a skill we all need.

    Plus, we have an abundance of food available while not everyone is so lucky, so fasting can help us remember our good fortune and help us add a little Gratitude to our day, which is always a good thing.

    That’s all she wrote.

    Have a great Monday.

    PEACE~
    EW